Author Topic: True Scale Couper instalation guide  (Read 2846 times)

0 Members and 1 Guest are viewing this topic.

garethashenden

  • Crew
  • *
  • Posts: 2327
  • Respect: +1820
True Scale Couper instalation guide
« on: January 29, 2017, 01:14:30 PM »
+2
I decided shortly after their release that Micro Trains' True scale couplers were the couplers I wanted to use. I've been slowly installing them over the past few months and thought I'd share how I did it in the hope that someone might find it useful.

Converting truck mounted couplers is fairly straight forward and I'll go over it later but the harder conversion is with cars that have body mounted couplers with integral coupler boxes. These usually come with Accumates, MTL 1015s, or 1015 clones and are quite common on recent releases.
The TSC coupler box has two pins, whereas most other couplers only have one; one for the coupler to pivot around and another for the mounting screw. It seemed that the only way to get the new coupler onto the car was to cut off the existing coupler box and I wasn't enthusiastic about cutting up $25+ dollars of car, especially with my habit of not finishing projects.
Well, I had a brainwave this morning and figured out how to install the TSCs in the existing box in such a way that if I decide to switch back to standard couplings or sell the car it is reversible. It's also very quick.
Here we go:

I'm working on one of Atlas' new PS1 boxcars. Here is the underside in its unmolested state.
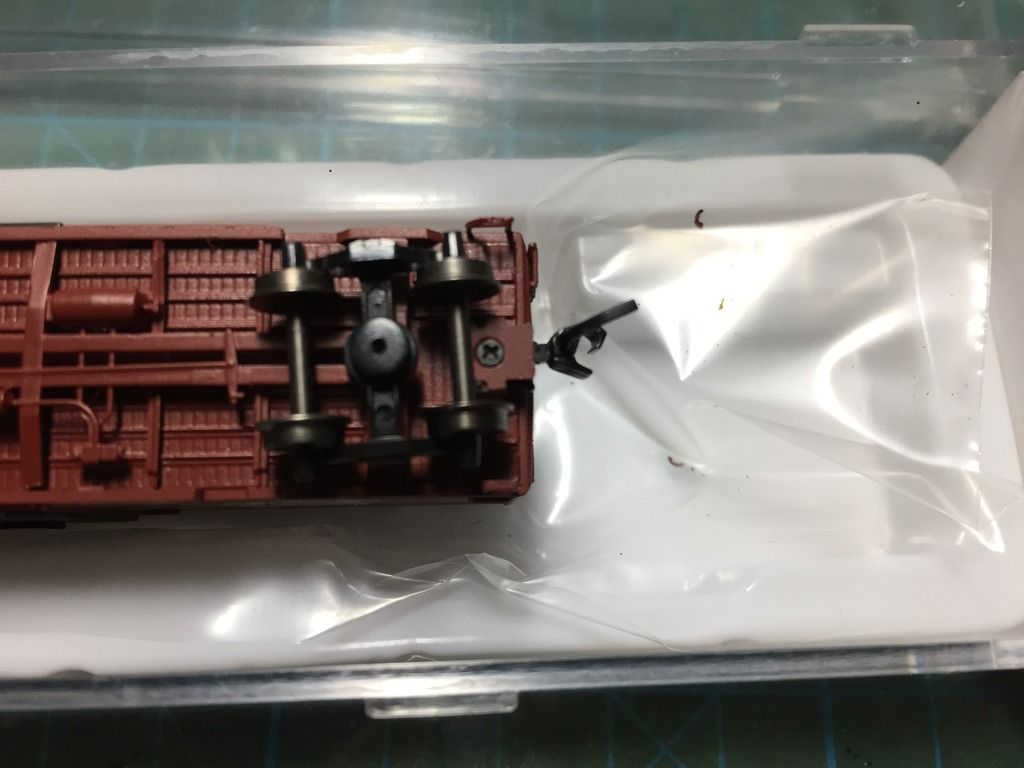

Remove the truck, unscrew the coupler box. Keep the screw and the lid, do whatever you want with the coupler.
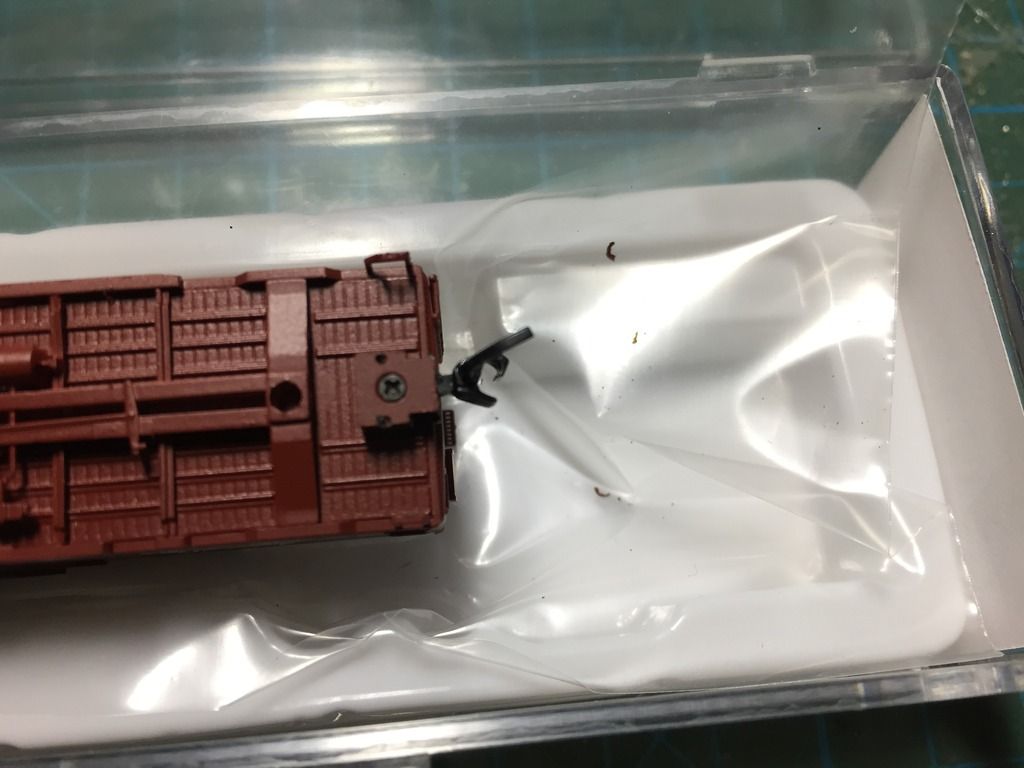

Go find some 0.045" (1.2mm) brass wire. Drill a 0.045" (1.2mm) hole in the coupler box half way from the center of the mounting screw hole to the front edge. Inset the wire.
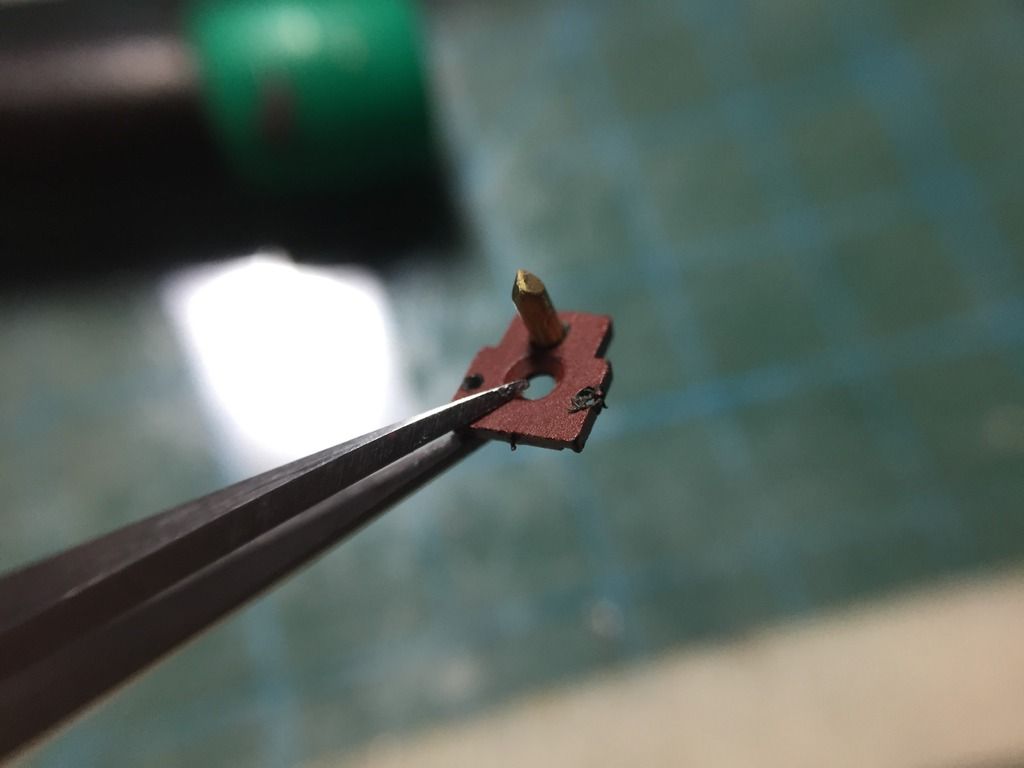

Make sure the inside end of the wire is filed flat.
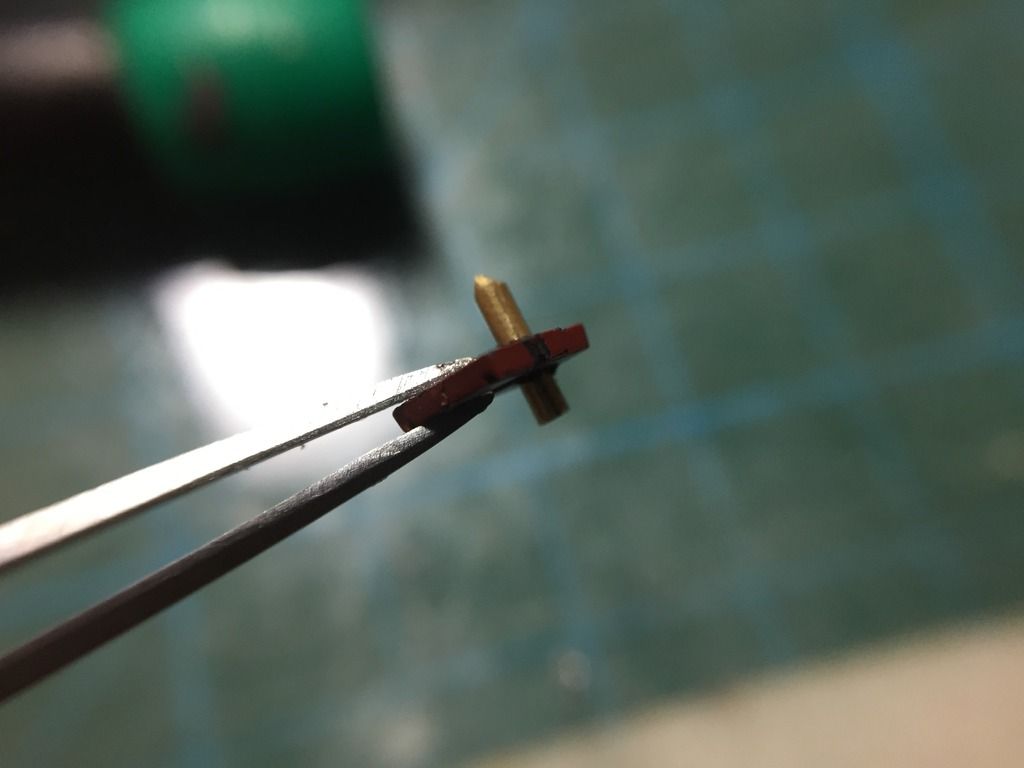

Put the lid back on the car and adjust the wire so that it touches the other side of the box but still allows it to sit level.
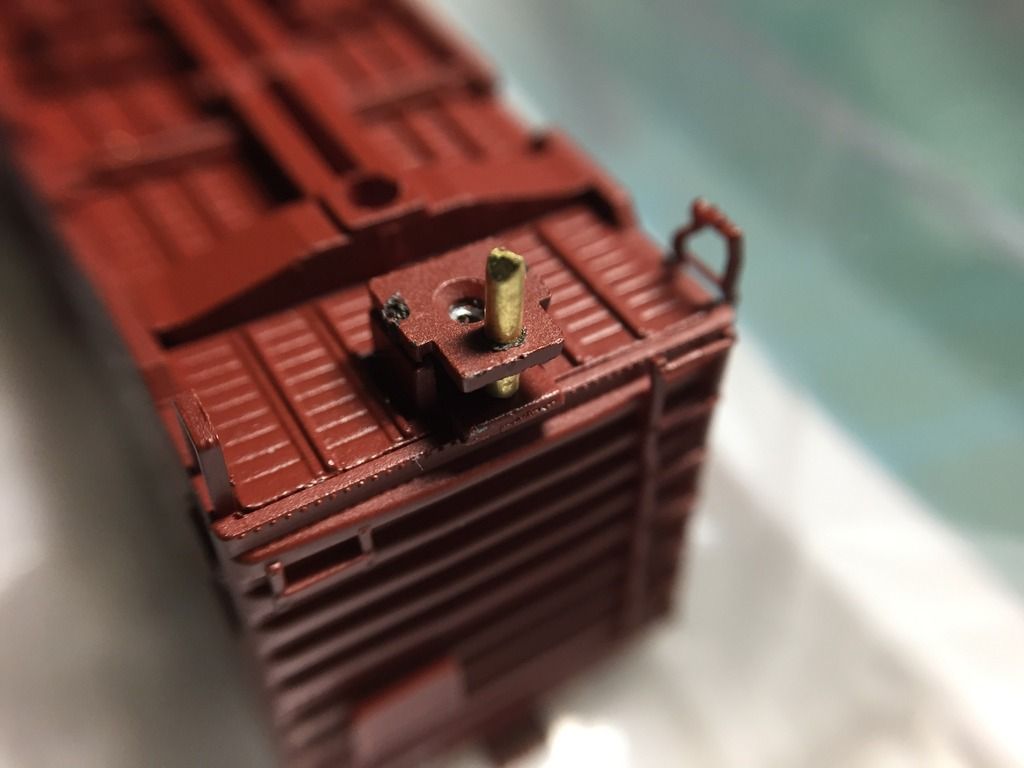

Trim the extra wire off and file it flat. It doesn't need to be flush but the closer the better. Depending on how snug it is in the hole it may need to be secured with a small drop of superglue. Put this on the outside.
Next, assemble the coupler on the brass wire.
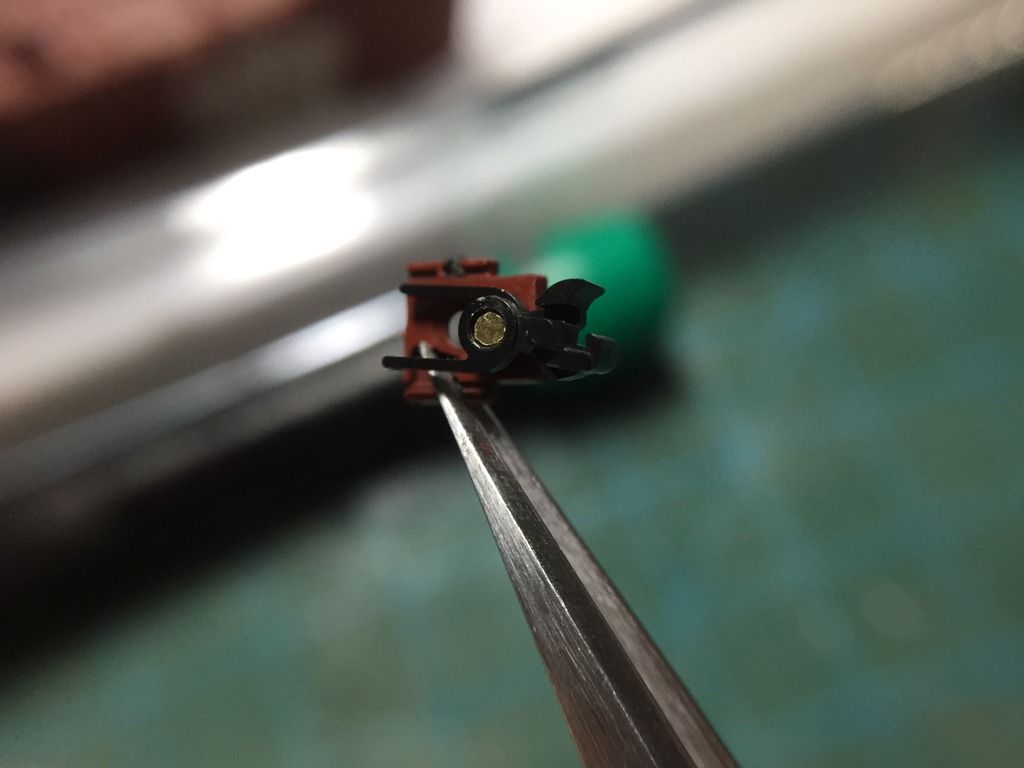

Install the coupler on the car, reinstall the truck, and you're done. Add the brakeline if you want. (I will, I just haven't done it yet.)
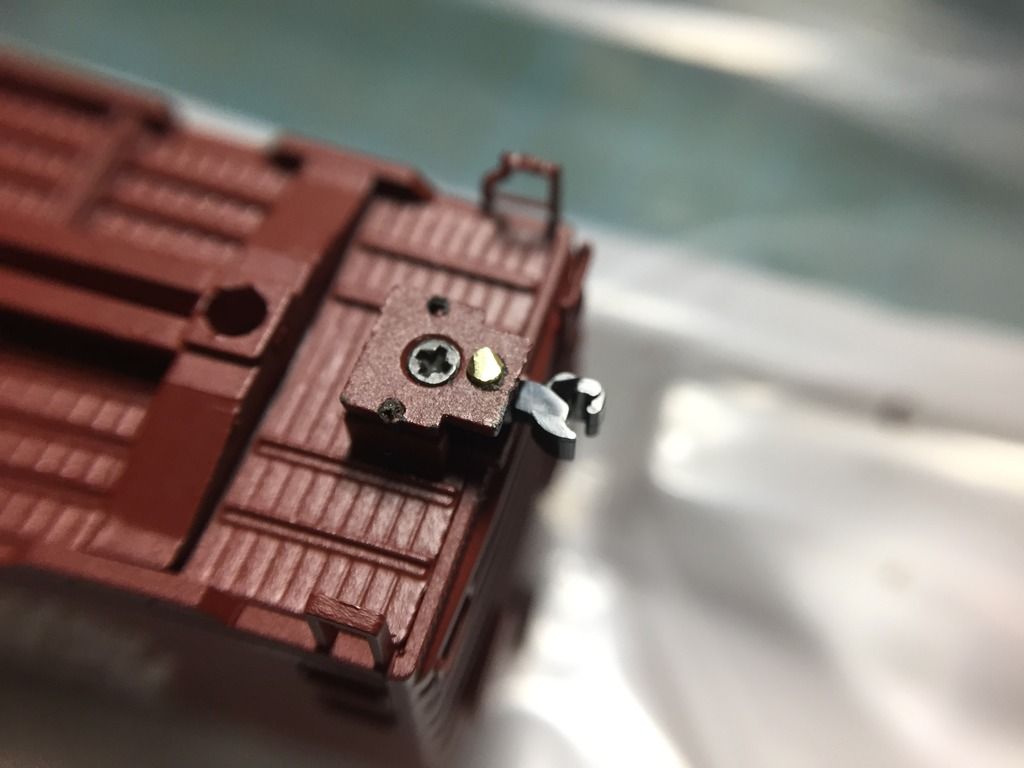

All done:
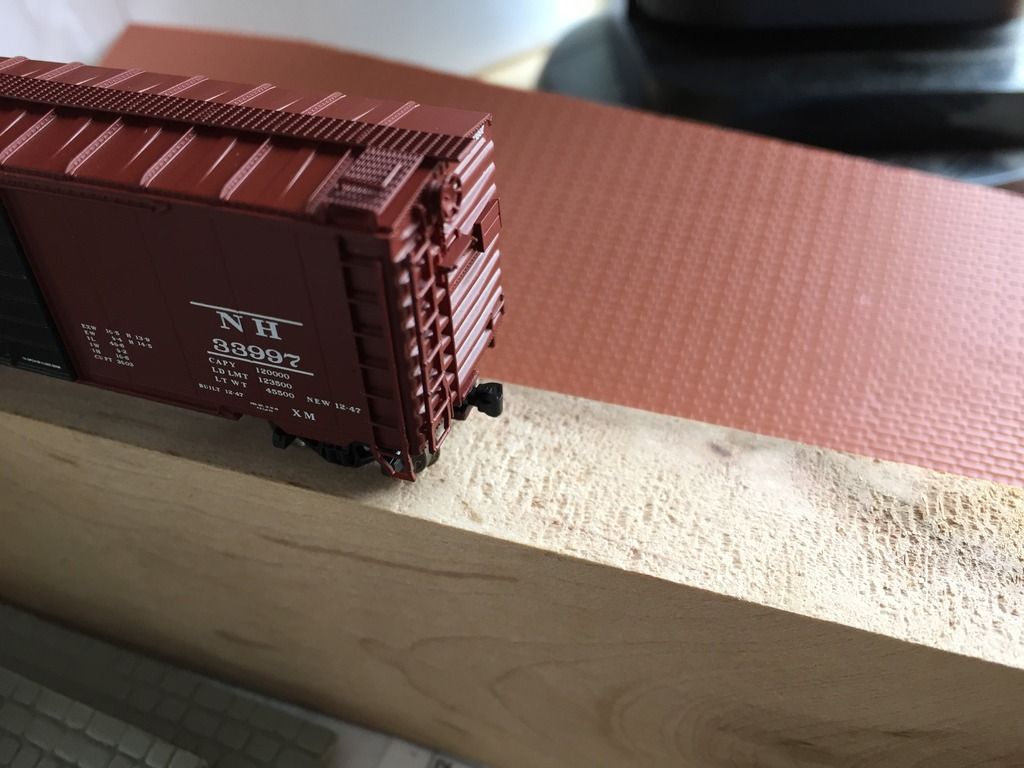

Hope this helps.
« Last Edit: January 29, 2017, 02:22:17 PM by garethashenden »

wcfn100

  • Crew
  • *
  • Posts: 8945
  • Respect: +1381
    • Chicago Great Western Modeler
Re: True Scale Couper instalation guide
« Reply #1 on: January 29, 2017, 02:28:31 PM »
0
Nicely done.  Are you able to do another car and couple them together? 

Jason

garethashenden

  • Crew
  • *
  • Posts: 2327
  • Respect: +1820
Re: True Scale Couper instalation guide
« Reply #2 on: January 29, 2017, 03:34:02 PM »
0
Nicely done.  Are you able to do another car and couple them together? 

Jason

I'll do my other PS1s soon. In the meantime here it is coupled to a FVM wagontop boxcar. This was a really simple conversion, remove the 1015 with box, install TSC with box.

wcfn100

  • Crew
  • *
  • Posts: 8945
  • Respect: +1381
    • Chicago Great Western Modeler
Re: True Scale Couper instalation guide
« Reply #3 on: January 29, 2017, 04:01:17 PM »
0
Thanks for the picture, but I'm curious about two cars with the modification.  What you've done is a great conversion but is going to create a very close coupling distance.

Jason

garethashenden

  • Crew
  • *
  • Posts: 2327
  • Respect: +1820
Re: True Scale Couper instalation guide
« Reply #4 on: January 29, 2017, 04:20:57 PM »
0
Your right about the coupling distance. It is pretty close.

wcfn100

  • Crew
  • *
  • Posts: 8945
  • Respect: +1381
    • Chicago Great Western Modeler
Re: True Scale Couper instalation guide
« Reply #5 on: January 29, 2017, 04:34:30 PM »
0
Yeah but that's no so bad if that's the best solution for a given car.  Some of the modifications I'll be showing are not going to be for everyone, particularly flat cars.  The more options the better.

Jason

Doug W

  • Crew
  • *
  • Posts: 82
  • Respect: +40
Re: True Scale Couper instalation guide
« Reply #6 on: January 29, 2017, 04:44:01 PM »
0
Good idea. How do the couplers perform with this modification (from a coupling/uncoupling perspective)?

Doug


chessie system fan

  • Crew
  • *
  • Posts: 1505
  • Gender: Male
  • Respect: +1343
Re: True Scale Couper instalation guide
« Reply #7 on: January 29, 2017, 07:01:16 PM »
0
Excellent.   What about coupler height?  I presume it's correct?
Aaron Bearden

Kentuckian

  • Crew
  • *
  • Posts: 951
  • Gender: Male
  • "This all started with Romans 10:9!" -Apologetix
  • Respect: +618
Re: True Scale Couper instalation guide
« Reply #8 on: January 29, 2017, 07:24:57 PM »
+1
[ Guests cannot view attachments ] Last night I installed a TSC on an Atlas C&O caboose. If you use the lid it puts the coupler too low. I just used the box with no lid. Clipped off the box latches, and used a sprue cutter to clip off the end of the pivot pin after the two coupler halves were installed. I completely obliterated anything having to do with the stock coupler below the deck. Removed the ladder/brakewheel/handrail casting and drilled a hole in the deck. Used a brass screw and nut to hold the coupler, with the nut on top. Then used a cutoff wheel to cut part of the nut and screw off, and then tried to paint. You can see the nut and a scratch on the body from the cutoff wheel; have to be more careful on the other end. The nut doesn't really show up under normal lighting.
« Last Edit: January 29, 2017, 07:30:58 PM by Kentuckian »
Modeling the C&O in Kentucky.

“Nature does not know extinction; all it knows is transformation. ... Everything science has taught me-and continues to teach me-strengthens my belief in the continuity of our spiritual existence after death. Nothing disappears without a trace.” Wernher von Braun

garethashenden

  • Crew
  • *
  • Posts: 2327
  • Respect: +1820
Re: True Scale Couper instalation guide
« Reply #9 on: January 29, 2017, 08:15:54 PM »
0
Excellent.   What about coupler height?  I presume it's correct?
It looks to be spot on, but I haven't put a micrometer to it.

Good idea. How do the couplers perform with this modification (from a coupling/uncoupling perspective)?

Doug

I'm not entirely sure to be honest. I don't have a layout of to test these on, at least not yet. On plain track and with finger switching, they seem to be the same as other TSCs, i.e. the ones in their intended boxes.

robert3985

  • Crew
  • *
  • Posts: 3552
  • Respect: +1924
Re: True Scale Couper instalation guide
« Reply #10 on: January 30, 2017, 09:28:53 AM »
0
This might help.

Here are a couple of photos of some old Wilson steel ice reefers coupled together at the Utah State Railroad Museum at the Ogden Union Station.

Photo (1) - How far apart are they???


Photo (2) - Here's the answer:


That's .2656" in N-scale

Cheerio!
Bob Gilmore
« Last Edit: January 30, 2017, 10:14:51 AM by robert3985 »

garethashenden

  • Crew
  • *
  • Posts: 2327
  • Respect: +1820
Re: True Scale Couper instalation guide
« Reply #11 on: January 30, 2017, 09:40:32 AM »
0
This might help.

Here are a couple of photos of some old Wilson steel ice reefers coupled together at the Utah State Railroad Museum at the Ogden Union Station.

That's .2656" in N-scale

Cheerio!
Bob Gilmore

Just measured the two PS1s, they are 0.202" apart when coupled. I wonder if long shank couplers would be better? I may do a pair and see.

jereising

  • Crew
  • *
  • Posts: 750
  • Gender: Male
  • Respect: +610
    • The Oakville Sub
Re: True Scale Couper instalation guide
« Reply #12 on: February 03, 2017, 03:11:45 PM »
0
I may very well try this technique on some of my BLMA cars.

I will give a warning on the long shank version:  the spring near the pivot hole has a weak spot.  When the coupler doesn't want to couple easily it may be because the spring is not holding the two pieces together as do the short shanks.  And when disassembled, one can see the weak spot when flexing the spring.  This can also cause break-aparts.  I just completed a long articulated auto rack train using only short shanks - see the other thread for more details...
Jim Reising
Visit The Oakville Sub - A Different Tehachapi - at:
http://theoakvillesub.itgo.com/
And on Trainboard:
http://www.trainboard.com/grapevine/showthread.php?t=99466