My latest project is installing an ESU LokSound 5 Nano in an Athearn F59PHI.
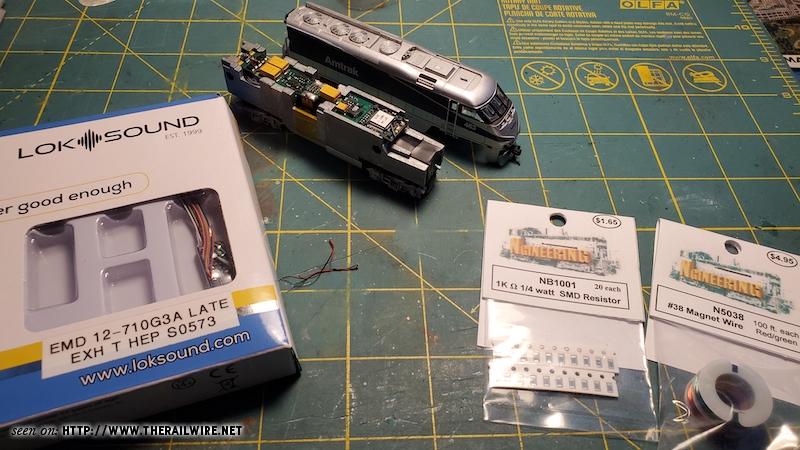
I have the decoder, some 0402 LEDs (both golden white and red), SMD resistors, #38 magnet wire, some heat shrink tubing...I've done a wired installation before and this loco is already DCC-ready (I accidentally fried the factory-installed Tsunami decoder a few years ago), but I'm stuck.
Wiring the motor and contacts is going to be the easy part.
The tricky part is installing the lights. The default uses a cold white LED on the Tsunami decoder that barely shines through into the plastic light piping.
I want to use my 0402 LEDs for the headlight and for operating alternating ditch lights. I also want to install red marker lights in lieu of the rear headlight, so the red marker lights in the nose light up when the loco reverses.

As you can see, the interior of the nose is not very accessible, since there's a piece that the front coupler screw into that's covering the part I need to access. I have no idea how to remove this, and the anxiety-inducing part is worrying I might destroy the shell (I already snapped off one of the snow plow pegs in a lame-brained attempt to remove it).
Has anyone done this? How do I remove that section that covers the nose interior? I've seen YouTube videos on DCC sound installs for this loco, but all they show is the finished product in action and don't show any information on how to install lights into the nose of the loco.


