Author Topic: Building in Phases  (Read 2594 times)

0 Members and 1 Guest are viewing this topic.

conrail98

  • Crew
  • *
  • Posts: 1462
  • Gender: Male
  • Respect: +44
Building in Phases
« on: March 11, 2015, 01:13:33 PM »
0
As I contemplate a new design, I know I'm going to be building it out in phases. My question is, other's who have built there layouts in some form of "phases" how did you go about doing it? Did you build out a specific section, including benchwork and track, maybe some scenery, then move on to the next? Or did you build out the benchwork and lay out the mainline then go back and fill in the details? Or something else entirely, like take parts of old layouts and drop them in the basement?

Thanks,

Phil
- Phil

wm3798

  • Crew
  • *
  • Posts: 16573
  • Gender: Male
  • I like models. She likes antiques. Perfect!
  • Respect: +7469
    • Western Maryland Railway Western Lines
Re: Building in Phases
« Reply #1 on: March 11, 2015, 02:01:42 PM »
0
I started out with an overall plan of how I'd fill the room, including setting benchwork elevations and locations of key scenes.  Once I engineered out where everything would be, I started with the most complex part, which housed some hidden staging on a lower level, and the main junction that would feed the rest of the layout.

I took all my measurements, laid out the plan in a scale drawing, and headed out to the workshop to start construction.  The first phase was 3' x about 8', and started with an L girder frame I had salvaged from two previous layouts.


The staging level, with a one turn helix that would eventually connect to the rest of the layout.


Next I installed the scenery level framing that would cover the staging yard.


And went to work on the scenery bits.


Did the placements of major structures and tracks in the paper mill scene that would dominate this part of the railroad...


and even installed the scenery base.  All out in the garage.  It was handy to do this, because once it got installed in the attic, it would be near impossible to reach the areas that would end up in the back under the sloping roof.


It was also nice to be able to tip the frame up on its side to work on the wiring underneath.  No hot solder fell in my eyes on this project...


Here it is the day it was ready to haul up the steps.  This shows the back of the frame that would be against the wall when installed.


And here it is in place, ready to begin the next stage.


Finally, once I had the room renovation complete, a friend came over and we hauled the first section up the steps and into the train room.


I continued to work on this section while I worked out a temporary track plan that would at least allow me to run some trains.  I added some elevation to the scenery that I couldn't do out in the shop, because it would have made the section too tall to bring up the stairs.
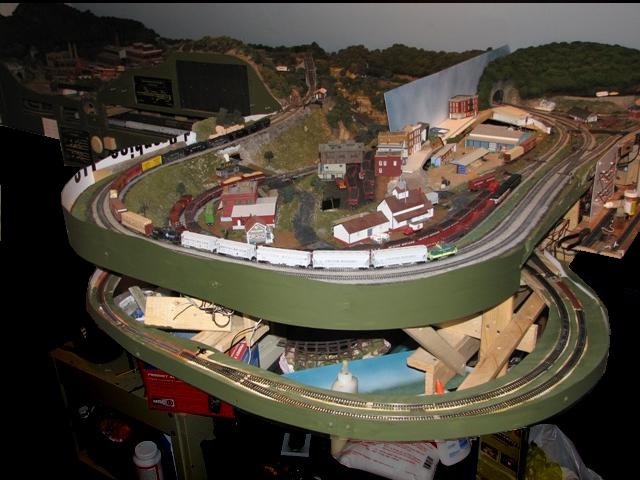

Eventually I built this peninsula to close the loops and create a basic layout I could run trains on.  The lower tracks connected to the staging yard.

Eventually I connected the loops to a temporary yard, and ran a line around the room on a narrow shelf to connect to the staging yard.
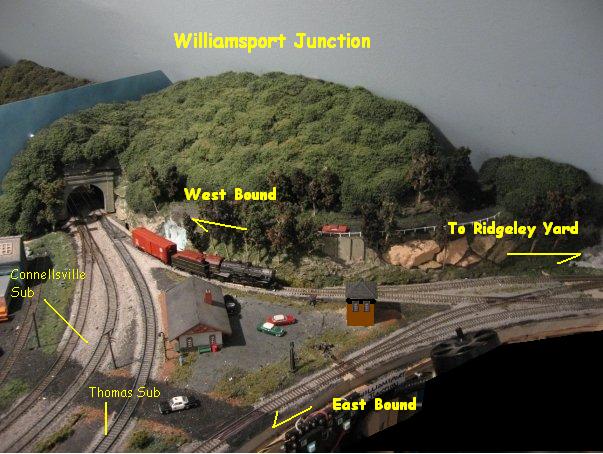

This junction tied the yard lead to the layout.

and the yard, temporary though it may have been, was tricked out with a little engine terminal and scenery.

I worked with this layout, even hosted several ops session, for a few years while I planned out the final expansion that became the finished product.

These scenes were all built on the temporary loops section.


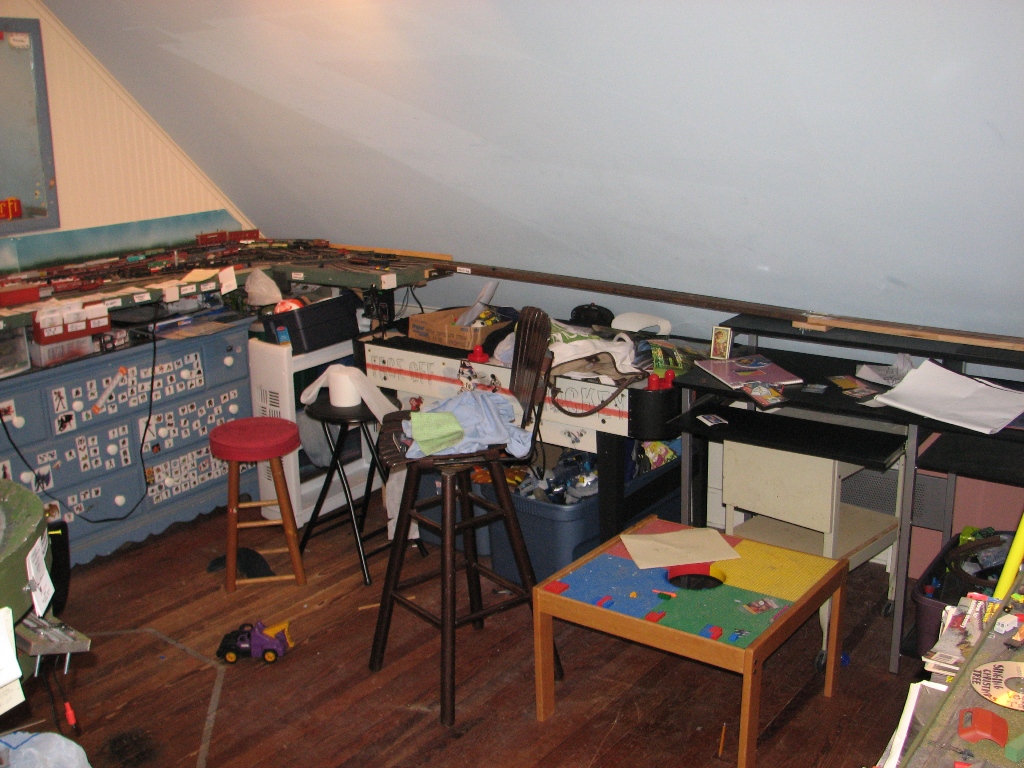
Eventually I tore down all of the temporary stuff and replaced it with a huge yard, bigger and better scenery, and a more complete operating scheme, including a second large staging yard.  Over all, it took about 10 years to get from the beginning to the day it came down.

The best part about working in stages is that all along the way I learned new techniques and skills, new technology became available, and I gained a much more thorough understanding of operations.  Mistakes I made on trackwork on the first section were not repeated over the whole layout, and when I learned something new, I only had to fix the parts that were already done, not the whole layout!

The one thing that was critical, though, was to make sure my wiring was clearly labeled and color coded, so as I changed things up I didn't have to climb into the rat's nest and do it all over.  Make sure you set up a clear system for that, and stick to it.  I had separate circuits for track power, turnout control, and scenery lighting. 

Eventually I added DCC turnout control along the main line, so I had to change up some things, but having a system to follow made it easier.

I hope this helps you think through your project.  Basically, start with a critical junction or other section that will be an epicenter of operations, trackwork, and details.  Then let the rest of the layout flow from there.

Lee


Rockin' It Old School

Lee Weldon www.wmrywesternlines.net

Blazeman

  • Crew
  • *
  • Posts: 1306
  • Respect: +65
Re: Building in Phases
« Reply #2 on: March 11, 2015, 02:40:07 PM »
0
Lee: Your discussion and photos are worthy of an article in the magazine rather than a column. There could be an epilogue of how the layout then was removed in sections and those sections then incorporated in layouts of friends.

conrail98

  • Crew
  • *
  • Posts: 1462
  • Gender: Male
  • Respect: +44
Re: Building in Phases
« Reply #3 on: March 11, 2015, 02:46:47 PM »
0
Lee, thanks for the detailed explanation on your former layout and it's construction. I agree with @Blazeman, it would make for an interesting article on building in phases, completely sections at the workbench, etc. For what I'm planning, I'm thinking starting with the prime switching area, but like you, would like some kind of loop or connection so I can run trains on/off to keep some play value when have time,

Phil
- Phil

C855B

  • Crew
  • *
  • Posts: 11426
  • Respect: +2897
Re: Building in Phases
« Reply #4 on: March 11, 2015, 03:21:55 PM »
0
My soon-to-be-started layout will be constructed in four "full" phases, that is, each phase completed to scenery (or nearly so) before starting benchwork on the next. Order will be green, yellow then blue, with a second level after blue:

...mike

http://www.gibboncozadandwestern.com

Note: Images linked in my postings are on an HTTP server, not HTTPS. Enable "mixed content" in your browser to view.

There are over 1000 images on this server. Not changing anytime soon.

wm3798

  • Crew
  • *
  • Posts: 16573
  • Gender: Male
  • I like models. She likes antiques. Perfect!
  • Respect: +7469
    • Western Maryland Railway Western Lines
Re: Building in Phases
« Reply #5 on: March 11, 2015, 03:32:19 PM »
0
Thanks guys.  Yeah, that light was sort of flickering on as I was assembling that! ;)

Lee
Rockin' It Old School

Lee Weldon www.wmrywesternlines.net

peteski

  • Crew
  • *
  • Posts: 35337
  • Gender: Male
  • Honorary Resident Curmudgeon
  • Respect: +6665
    • Coming (not so) soon...
Re: Building in Phases
« Reply #6 on: March 11, 2015, 03:51:50 PM »
0
Thanks guys.  Yeah, that light was sort of flickering on as I was assembling that! ;)

Lee

Do it!
Plus, what happened to your regular column in the N-Scale Mag?  I used to enjoy reading it.
. . . 42 . . .

rickb773

  • Crew
  • *
  • Posts: 601
  • Gender: Male
  • Rickb773
  • Respect: +1062
    • Pennsylvania-Reading Seashore Lines
Re: Building in Phases
« Reply #7 on: March 11, 2015, 04:59:02 PM »
0
I started with a 4'x8' L girder cookie cutter layout that allowed me to quickly run 2 to 3 trains and do switching while operating it as a PRR branch connecting to both the PRR and Reading.

My long range goal was always to incorporate it into a much larger layout that would have a version of Carl Appel's S gauge Norfolk & Ohio yard (Model Railroader November 1958 "centerfold"). That meant a an 11'x19' addition that got to the point of basic scenery and only loop continuous operation (N-Scale Magazine Nov/Dec 2011). The basic scenery was almost in when a medically required move (wife) to a one story home was necessitated. Scenicing that big addition was slow.

MR Magazine November 1958


The 4'x8' survived (N Scale Magazine Sep/Oct 2012) and kept me operating until I could get the new layout in the works.


I always had it in the back of my mind that I would eventually have to model the railroad I grew up with (Pennsylvania-Reading Seashore Lines) in the towns in which I lived and went to High School. (What delayed the process was that I would be stuck with those ugly, "blackish" Baldwin AS-16 Road Switchers [which still are not available in N scale] for motive power.)

The "new" layout was built in non-standard modules, a town at a time. This allowed me to do basic construction in the garage before moving them to the loft. I could then scenic them as I went, adding stand-in structures to motivate me to keep going onto the next modules. By the time the Brooklawn, Westville, North Woodbury, and Woodbury modules were complete enough, the 4'x8' was forced out (it now resides 1200 miles away). At this point (end of phase 2 - Woodbury construction), I had a glorified 8'x17' loop (not very interesting).


Phase 3 construction (Camden, Manayunk, Philadelphia) required the slow process of burrowing through built in book shelves ("diorama" opportunities) but ended up with an operational yard (the "not as beautiful" remnants of the N&O yard). With the yard came a non-loopish operational layout that is readying for its 3rd op session. None of my layouts will win any awards but the pleasure of constructing and operating them has fulfilled its hobby/pleasure purposes.
http://rickb773-prsl.blogspot.com/

Having done it multiple ways, I highly recommend do it a piece at a time, including the scenery phase before moving onto the next section. Put temporary end loops in place so you can enjoy the motivation of running trains. So many modelers seem to build vast layouts that never get past the plywood (/HCD) phase and thereby lose the extra motivation you get from seeing basic scenery in place.
« Last Edit: March 11, 2015, 05:05:29 PM by rickb773 »

eja

  • Crew
  • *
  • Posts: 1528
  • Gender: Male
  • Respect: +279
Re: Building in Phases
« Reply #8 on: March 11, 2015, 07:42:49 PM »
0


....... because once it got installed in the attic, it would be near impossible to reach the areas that would end up in the back under the sloping roof.


Guess we know where the first (and most) derailments will occur !

mu26aeh

  • Crew
  • *
  • Posts: 5869
  • Gender: Male
  • Respect: +4872
Re: Building in Phases
« Reply #9 on: March 11, 2015, 08:13:52 PM »
0
I am working on mine is sections.  My entire benchwork is up, but I'm laying track in sections.  I started with my paper mill, figuring I could get track work down and could just set up some temporary staging tracks, and run some switching locals while I work in other areas.  I have recently laid the track into staging area, and the major yard for the layout.  I can now finish the end of the yard, and the wye/junction for my branch line where the paper mill is.

conrail98

  • Crew
  • *
  • Posts: 1462
  • Gender: Male
  • Respect: +44
Re: Building in Phases
« Reply #10 on: March 11, 2015, 11:53:11 PM »
0
Thanks for all the info guys. Definitely have some things to think about. One other thing I've seen is the "traveling" staging yard, basically a yard on casters that could be wheeled to the end of the layout,

Phil
- Phil

Mstyle88

  • Posts: 13
  • Respect: 0
Re: Building in Phases
« Reply #11 on: March 12, 2015, 12:46:19 AM »
0
This topic interests me as well and I think its a great way for an 'armchair' modeler to stop procrastinating. I plan on doing this when I begin construction of a small layout over the summer. This idea has also been discussed before in a few different Model Railroad Hobbyist columns:

http://model-railroad-hobbyist.com/magazine/mrh-2013-05-may/rr_one-module-challenge
http://model-railroad-hobbyist.com//magazine/mrh-2014-04-apr/staff-notes

OldEastRR

  • Crew
  • *
  • Posts: 3791
  • Gender: Male
  • Respect: +516
Re: Building in Phases
« Reply #12 on: March 13, 2015, 03:20:28 AM »
0
I'm trying a new idea for layout building that takes the best of permanent and modular layouts but leaves the undesireable aspects. My first concern was stability, so I built a framework much like a permanent layout, a rock-solid base but one that can be unbolted and disassembled. Second concern was easy access to every part of the layout, thus requiring the ability to build and scenic layout pieces at the workbench. This meant making scenery sections (base, track, wiring, terrain, structures, etc) in the manner of N track modules, which are then fastened to the one-piece benchwork. These sections are not modules; they are arranged in a specific pattern. A last concern was to make a layout that could be broken down into pieces that can easily get through doorways and stairwells for the inevitable move to a new place. Thus the bolted framework and removeable scenery sections.
The unexpected advantage to this method is from having the benchwork complete with a level top (it doesn't take very long to construct benchwork). So once you get a scenic section done and installed, it's possible to set down plywood temporarily on the open benchwork and use Unitrak/sectional track on it to connect both ends of your finished track into an operating loop. This way you can switch back and forth between layout building and train running easily and at any time. You don't get stuck in one long tedious task you need to complete before you get to do something you really like. The loose plywood and Unitrack can be removed quickly when you have another scenery section ready for installation.
I need to take some pix and restart my old thread about this layout's construction but I spend too much time on TRW. :trollface: