Author Topic: Jay Street Connecting Railroad  (Read 12827 times)

0 Members and 1 Guest are viewing this topic.

Chris333

  • Crew
  • *
  • Posts: 18096
  • Respect: +5515
Re: Jay Street Connecting Railroad
« Reply #30 on: September 24, 2013, 12:24:12 AM »
0
Just take a small piece and scenic it along with soaking and gluing it down. It may be fine.

timwatson

  • Crew
  • *
  • Posts: 638
  • Respect: +238
    • N Scale Rail
Belgian blocks
« Reply #31 on: September 29, 2013, 10:53:31 PM »
0
I had moved on from the foam core for the moment (don't worry I will come back to it) but like all ADHD model railroaders I've moved on to a new and COMPLETELY different project and that's how in the world will I do the amazing amount of belgian block that's in this railroad (and not have it cost a mint).

I've purchased some of the monster modelworks belgian block and am playing with it but I also got some very detailed images and started building a suitable texture to see if I can get it modeled in printer paper form. This is the pattern i've settled on I think. No discernable pattern and it's got the same colors and shapes as the real stuff because it is the real stuff.

Tim Watson
My pics: http://www.flickr.com/photos/nscalerail/sets/

Technology, new ideas and model railroading.

timwatson

  • Crew
  • *
  • Posts: 638
  • Respect: +238
    • N Scale Rail
Elmer's Cork foamcore
« Reply #32 on: October 07, 2013, 08:29:46 PM »
0
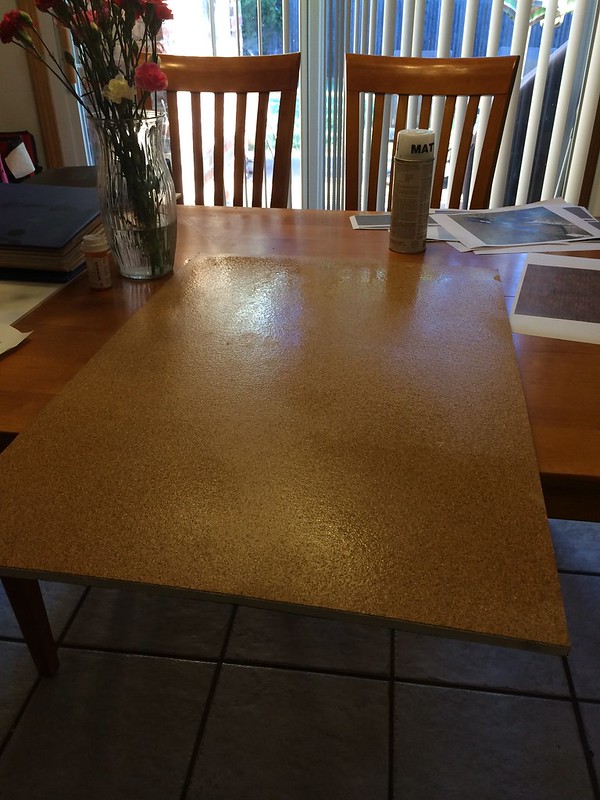
I have great news all. I got to experiment with the cork foam core this morning and I have to report that it is very water safe on the cork side. I'm not sure what kind of glue they used but it held fast and actually acted as a water barrier. I feel very very good about this material now. I do think I will need to brace it more across the long side but this is a good first step.

Sloppy wet cork foam core:
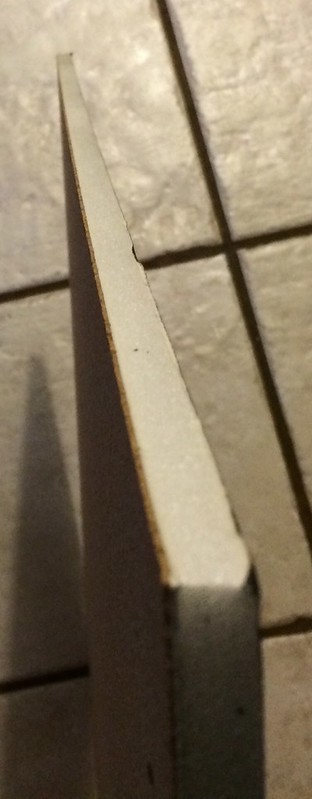

After it dried:


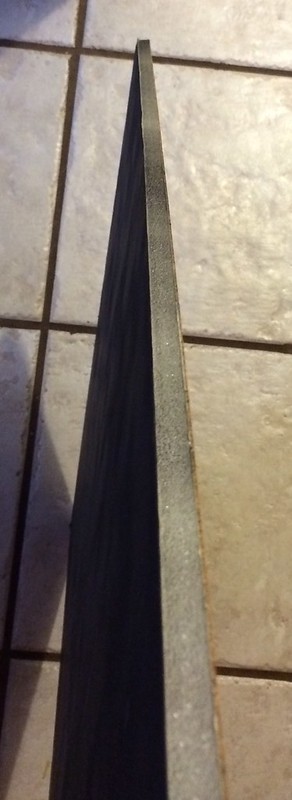
Some slight warpage on one side but remember I never had this glued down to anything. It was just setting there bein' all wet and stuff.


Here is what i've learned about this technique.
  • You MUST seal the paper side with paint. I highly recommend a cheap rattle can enamel. I want to brush paint some oil rustoleum but I haven't tried that yet. I do know the enamel rattle can worked great though.
  • Do NOT use latex brush paint to seal the paper side. I learned this the hard way ... it curled BADLY. I think it's just too much water for the paper to absorb.
  • I believe you could use a clear Krylon to seal the paper side if you want to keep it white.
  • The cork side seems to be sealed on the cork side and safe from water.

That's a fairly short list so far so I hope you guys give this a try and see how it works for you.

Next step is to build a new section.
« Last Edit: October 07, 2013, 08:31:59 PM by timwatson »
Tim Watson
My pics: http://www.flickr.com/photos/nscalerail/sets/

Technology, new ideas and model railroading.

timwatson

  • Crew
  • *
  • Posts: 638
  • Respect: +238
    • N Scale Rail
Re: Jay Street Connecting Railroad
« Reply #33 on: October 21, 2013, 10:30:08 PM »
0
I didn't have a ton of modeling time this weekend but I got float barges shaped and primered. They're made out of sanded 1/2" plywood.


Jay St. Float barge

For comparison:
Tim Watson
My pics: http://www.flickr.com/photos/nscalerail/sets/

Technology, new ideas and model railroading.

BoxcarNY

  • Posts: 1
  • Respect: 0
Re: Jay Street Connecting Railroad
« Reply #34 on: January 07, 2016, 02:26:15 AM »
0
I just made a delivery this evening to the J Street Dumbo area. I had known about the J Street connecting railroad but didn't give it too much thought in the past. I wish now I have done more exploration back in the 1980s when everything was still basically intact. I had delivered some furniture to a building on Plymouth Street the year ago took a few photos then and return to the same building again tonight. I took some photos of the diamond located at the intersection of Plymouth Street and Main Street. I then drove around some of the other blocks see what other remnants of the track or still in the cobblestones on other streets. I was surprised to see quite a bit still remaining. Again I wish I had done this 20 or so years ago.
a friend of mine Elliot  Janofsky is modeling a large portion of the J Street connecting in his garage in upstate New York.
I don't see him anywhere on this forum so I will contact him and make him aware of it he might have much to share.
I'm glad to have discovered this form and plan to visit it more frequently in the future.

espeeinoregon

  • Posts: 1
  • Respect: 0
Re: Jay Street Connecting Railroad
« Reply #35 on: February 24, 2018, 11:08:18 PM »
0
Hey Tom, any updates on this project? I'm really curious to see how your C benchwork turned out with the sceniced railroad. I'm getting ready to build my sectional shelf benchwork very similar to yours and I'd like any "hindsite" pointers that you might have.

timwatson

  • Crew
  • *
  • Posts: 638
  • Respect: +238
    • N Scale Rail
Re: Jay Street Connecting Railroad
« Reply #36 on: February 25, 2018, 09:33:10 AM »
0
I've not done much more with this. The C benchwork was and is very successful. For smaller work like TTrak modules you can use masonite hardboard.
Like so. I should note from when these pictures were taken I have angled the top lid/valance approx 30-45 degrees.


Here are some pics of my last build (complete with color changing leds):
https://www.flickr.com/photos/nscalerail/9609109327/in/album-72157635267130112/

Sincerely Tim Watson
« Last Edit: February 25, 2018, 09:36:54 AM by timwatson »
Tim Watson
My pics: http://www.flickr.com/photos/nscalerail/sets/

Technology, new ideas and model railroading.