I was just breezing thru M.C.'s layout report and decided that he is right! He is right about a lot of things, but specifically, in this case, it is time I start my own layout thread, so here goes:
I came from the world of HO. I belong to an HO club in the south bay called Silicon Valley Lines. There are a hand full of members in my HO club who also are involved in Free-moN. Eric, Dave, Mark, Murf and Dustin. They were trying to get me to build a module for some time, but I had no N scale trains or, at the time, any desire to get into N scale.
One day I went to the Great Train Expo in San Jose, CA and met M.C. for the first time. I had heard of him before. The SVL guys had told me about the speed and quality of his work. When I saw the shoofly in Sonoma module for the first time I was astounded. I was hooked. I snapped a few photos while I was there and headed home to design my first module.
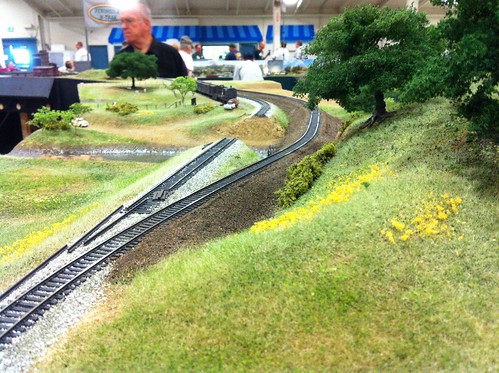
MC's ShooFly
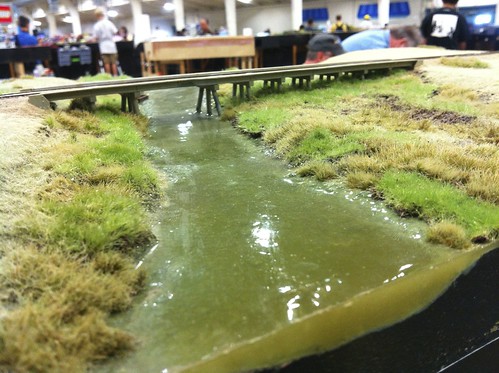
Dave F's Alviso
Never one to take things easy at first, I decided that for my first module I needed to build a huge bridge. I had little knowledge about building bridges, much less building ANYTHING in N scale, so it was bound to be a good learning experience.
I decided that it was also going to be a proto-freelanced bridge set somewhere in the west coast. Since it is a Free-moN module, I really didn't think a definitive location was necessary. This allowed me to design the bridge as I saw it in my head. I knew I wanted to incorporate a few elements into the module, but other than that I was gonna roll with the punches.
I knew I wanted a LONG bridge. I wanted an entire consist, plus a large amount of cars on the bridge at once.
I knew I wanted a river to run under the bridge.
I wanted one side of the canyon to be steeper than the other.
I wanted some sort of road across the module.
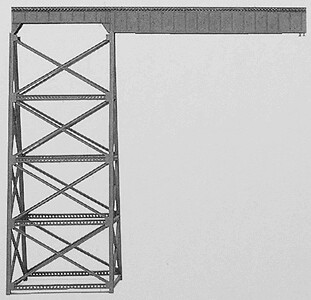
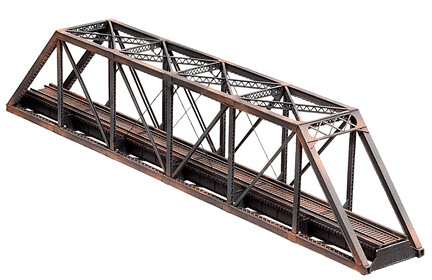
Those were my basic design requirements, so I set about ordering parts. TO THE INTERNET! I put together a list of parts that I thought would make a cool, long bridge. I knew that Micro Engineering made bridges in HO scale and thought I remembered seeing them in N. Here is what I ordered:
1 320' Viaduct bridge

[/url]
3 120' Viaduct Extensions
2 thru truss bridge kits.
After a few days I went back to the hobby shop and picked up this stuff.

Without much of a plan I got to work building a bridge. Now when I say I didn't have much of a plan it doesn't mean I hadn't been doing research. I had been looking at photos of bridges for some time thinking about what would be a feasible design. When I started building this is what I immediately came up with:
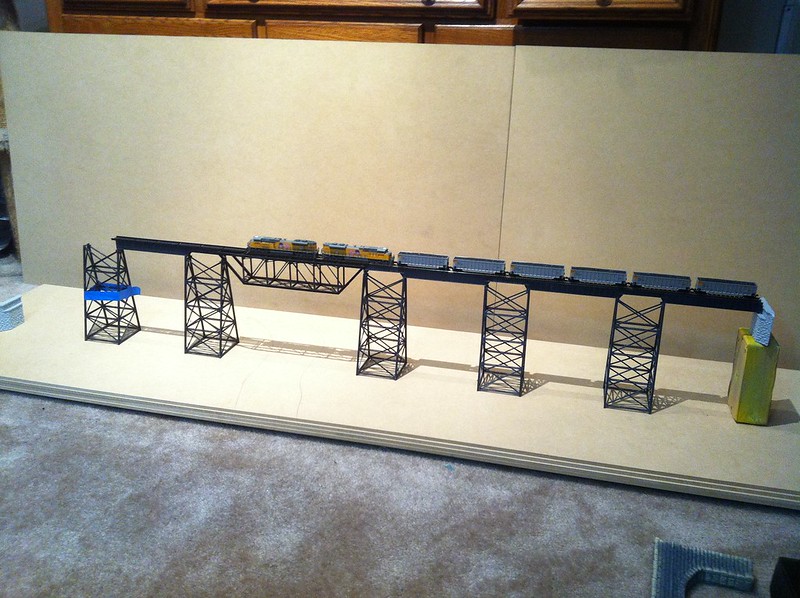
I thought It was a pretty good start and was happy with the amount of cars I could fit on it. I took the photo with me to a club meeting to show off the work I had done. One of the guys said "That looks cool, but the railroad wouldn't have built it that way." He was refering to the inverted warren truss bridge. Well weather the railroad would have like built it like this or not, I decided to rebuild the long truss span. At the same time I was terraforming the module and trimming down the bents to fit the landscape.
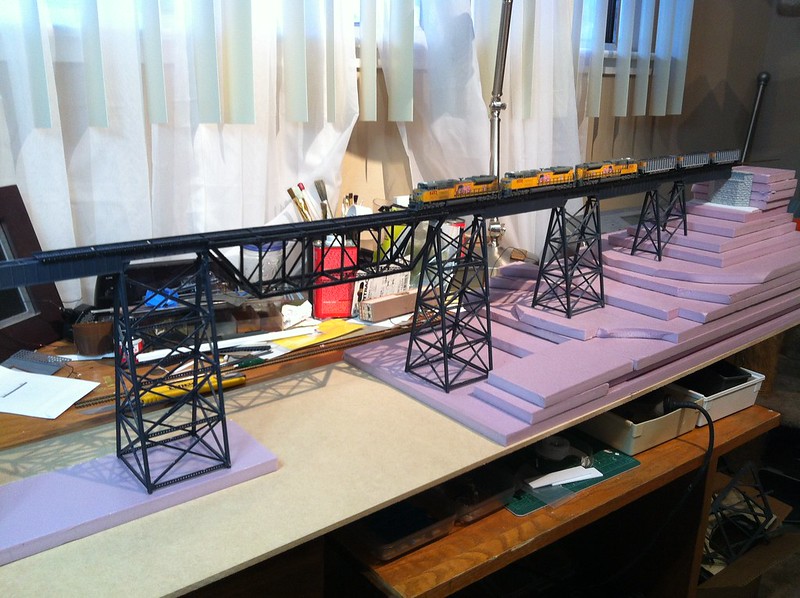
Revision 1.0 was a mediocre attempt. It allowed me to build a span that was a more suitable length, but ultimately I was not happy with the look.
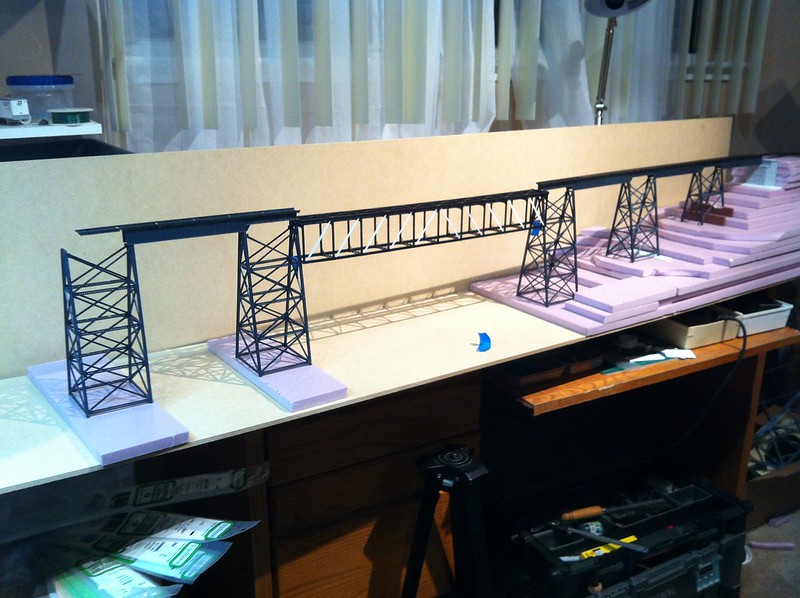
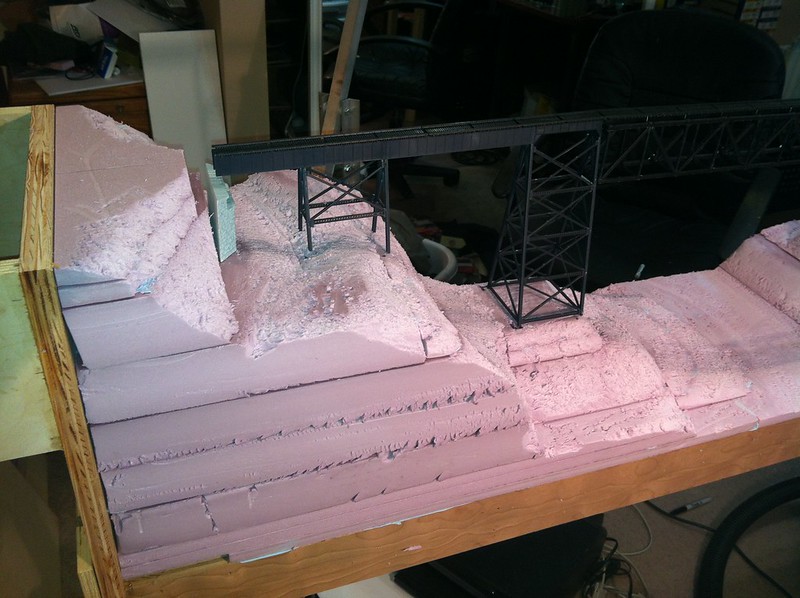
Revision 2.0 turned out much better. By this time I had terra formed the land and even built a frame for the module. The frame turned out to be 12" wide by approx. 7' long. At this point in time I only had the foam sitting in place. I had yet to glue it down.
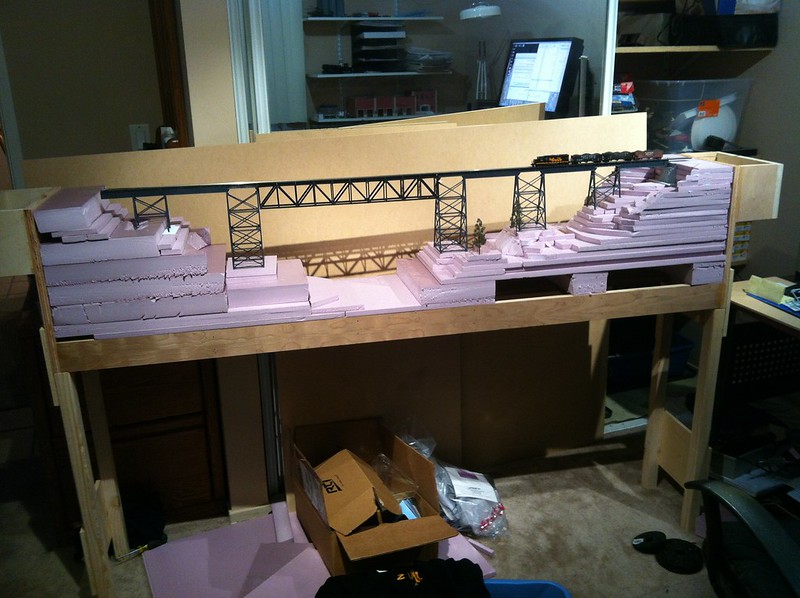
Once I had all the foam stacked, roughly shaped and glued in place, (I used LocTite Foam Board Adhesive for this step) I went to work with a sure form rasp. This is a VERY messy part of the process. It gets little chunks of statically charged foam EVERYWHERE. I recommend doing this with a shop vac on hand and while your significant other is not home. This is the result after the rasp:

I have a lot to write and post on this topic so I will continue to add additional posts to this thread with progress reports and photos. If I'm lucky, maybe a movie or two. Thanks for reading and checking out my modeling. Catch you next time.
Nils


