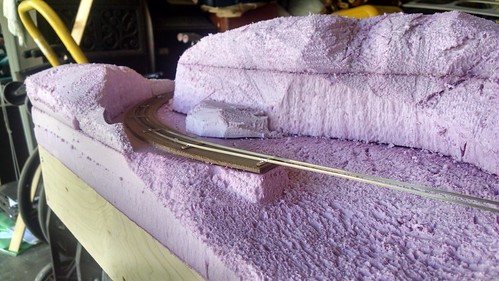
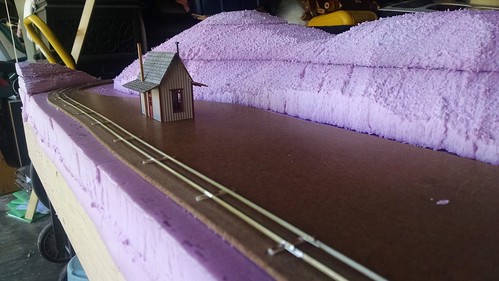
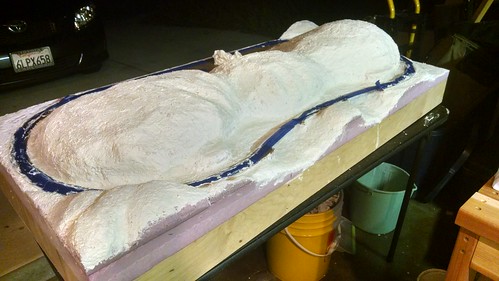
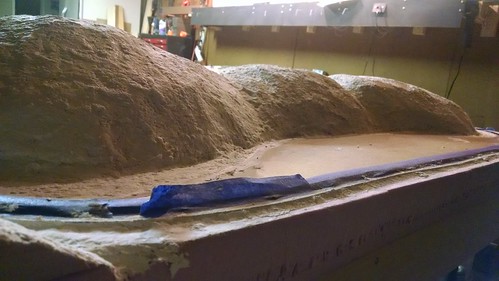
A busy few days around the workshop. I have finally finished contouring the landscape, and applied the first initial coat of Sculptamold to the layout.
 HOn30 update 9/23/14
 by
timgill1983, on Flickr
 HOn30 update 9/23/14
 by
timgill1983, on Flickr
 HOn30 update 9/23/14
 by
timgill1983, on Flickr
 HOn30 update 9/23/14
 by
timgill1983, on Flickr
 HOn30 update 9/23/14
 by
timgill1983, on Flickr
This is definitely an area where I have a bit of a learning curve. Visualizing and then executing the land contours in 3D proved to be a bit of a frustrating and painstaking excercise. However, I was more pleased when I started to blend the landforms together with Sculptamold.
 HOn30 update 9/23/14
 by
timgill1983, on Flickr
 HOn30 update 9/23/14
 by
timgill1983, on Flickr
The landforms will get a heavy sanding with 50 grit sandpaper, and then a "patch coat" of Sculptamold to clean up any big gaps or bubbles in the texture.
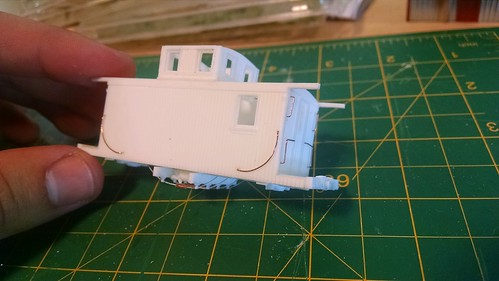
I am discovering more and more that working in HOn30 is giving me an opportunity to really stretch my modeling skills and explore projects that push my comfort zone. This Funaro & Carmelengo resin caboose kit is no different; this is my first resin kit, and, much as the Toma kit did, it is proving to be a bit of a learning curve. I have seen resin kits like this described as a "scratchbuild in a box," and I certainly can relate. I am about halfway through this kit, and am plugging along steadily.
 HOn30 update 9/23/14
 by
timgill1983, on Flickr
I am having trouble getting the nylon string on the underbody to the right tension. It just looks "slack" to me, and doesn't have the right-angles that it needs for the correct look.
 HOn30 update 9/23/14
 by
timgill1983, on Flickr
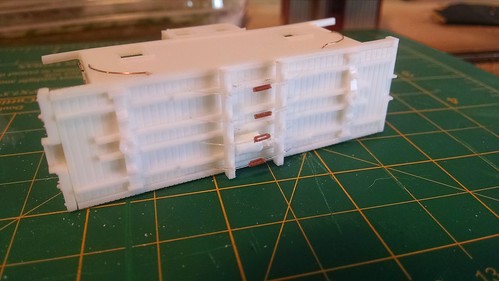
Additionally, my drilling for the wire handgrabs was a bit imprecise, so you can see minor imperfections in alignment.
 HOn30 update 9/23/14
 by
timgill1983, on Flickr
Being somewhat of a perfectionist, this bothers me a bit, but it really is something I can live with and learn from for next time. Must get some newer, sharper bits for my pin vise next time.
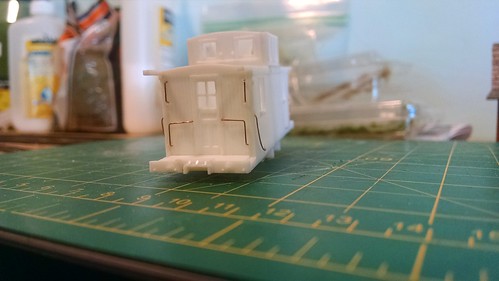
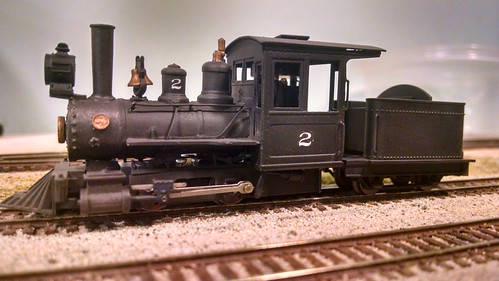
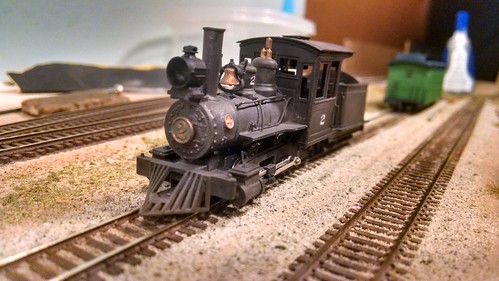
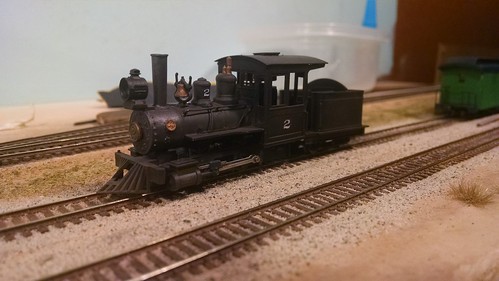
However, I am quite proud of how #2 is coming along. She was dullcote-d for "tooth" and given an initial coat of weathering with artist's pastels:
 HOn30 update 9/23/14
 by
timgill1983, on Flickr
 HOn30 update 9/23/14
 by
timgill1983, on Flickr
 HOn30 update 9/23/14
 by
timgill1983, on Flickr
I have to decide how to seal this coat of weathering (Dullcote spray-bombing seems to obliterate it), and then I'll do more specific "spot weathering" with rust/grease etc., as well as some drybrushing to pick out some highlights.
All in all, I think that I am enjoying the "roll-your-own" nature of working in HOn30 so far. It really is addicting, in its own way. Once you get a model to a certain level of completion, there is a lot of satisfaction gained.


