One aspect of making hand-laid turnouts that I've never liked is adding ties to the turnouts and painting them. Fast Track does make what they call QuickSticks. They are nice and will work with turnouts as long as the turnout matches where the PCB ties are on their templates or fixtures.
The drawback for me is they are $11 at the moment and I need 70-90. I can build a turnout with PCB ties I cut, their ME code 55 rail and separate wood ties for under $5 each. Add in the price of the QuickSticks and deduct for the individual wood ties and the cost is around $14 per turnout. If you are only making a few turnouts consider the QuickSticks. For me the cost of $4-$5 per turnout vs. $14-$15 per turnout is huge with needing ties for 70-90 turnouts.
Since I was gluing individual ties to turnouts and that could take 45-50 minutes per turnout I looked for another alternative. I moved to designing tie strips with Fusion and printing them with my BamBu A1 filament printer. Now this for sure isn't for everyone but it is going to be a big help to me and cost less than what I'm spending on individual tie resulting in a cost of about $4 per turnout.
I can paint the tie strips in seconds and install them to the turnout or the layout under it quickly..
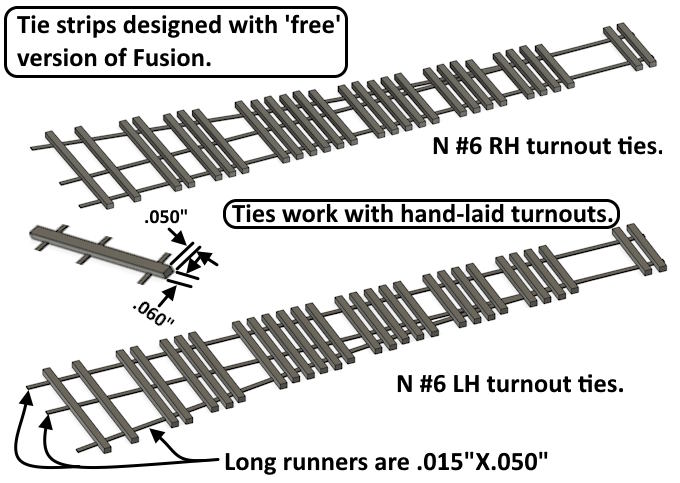
It Didn't take too much time to come up with a design using Fusion for #6 LH & RH tie strips (make one and mirror it and you have the other).
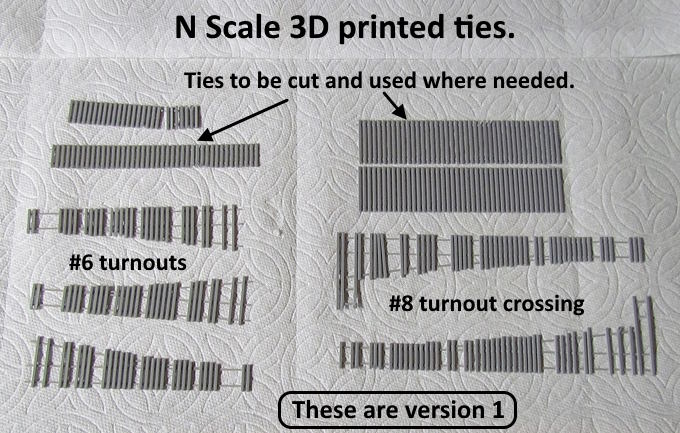
I printed some of the #6's and also designed some for a couple of #8 crossovers that Ed had made. This worked well except for occasionally during the printing process the print would detach from the build plate and be ruined. The problem was there wasn't much contact area between the print and the build plate, which you need, and if one tie lifted off the build plate the printhead would snag it and pull the print off the build plate. Some of the problem is the speed that the A1 print head is moving at during a print as it is a very fast printer.
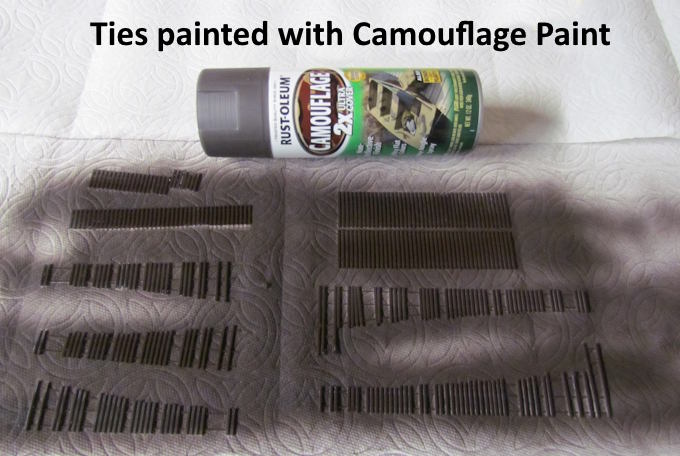
It was easy and fast to print the tie strips with the camouflage paint above. Fast Tracks recommended it and it matches the ties on the ME code 55 flex track I'm using well.
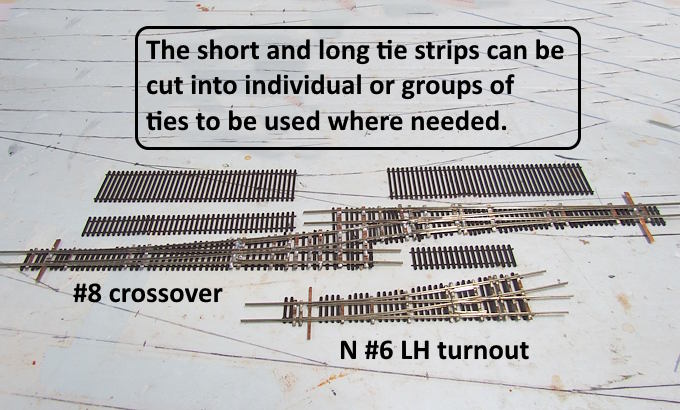
Above is an image of the first tie strips that were printed and painted. The turnouts still need to be painted.
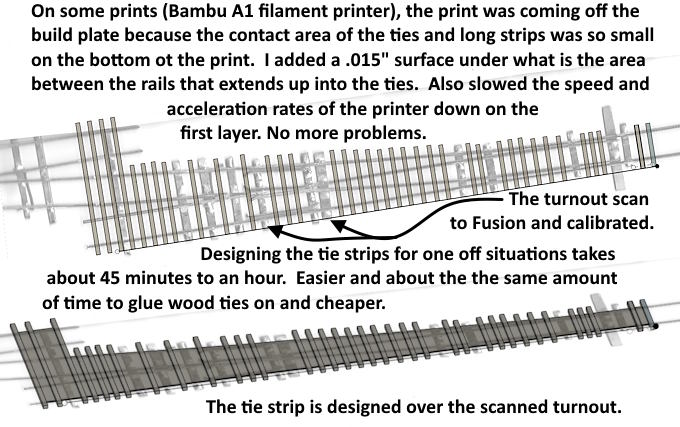
To deal with the build plate adhesion problem I added a very thin print layer between the rails. That gave the print more adhesion to the build plate and no more printing problems and it only added 1-2 minutes per print.
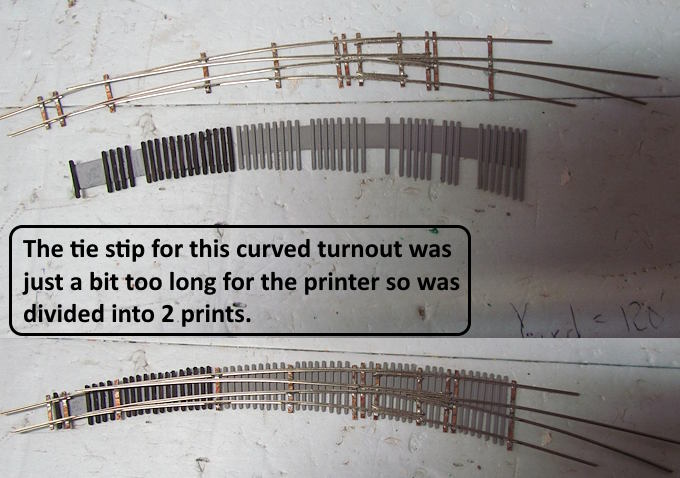
I started designing tie strips for curved and other turnouts. I would take about 50-60 minutes to do this per turnout. About as much time as gluing ties on but I like the results better and would rather be at the computer than gluing and re-gluing ties that fell off to the turnout.
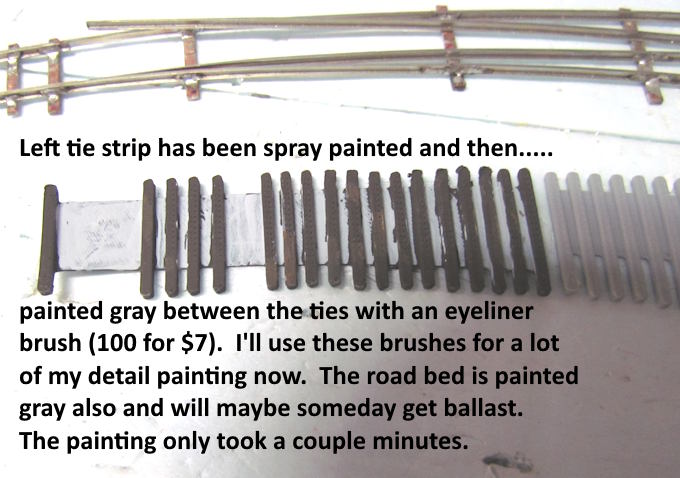
A negative was after spraying the ties with the camouflage paint I needed to paint between the ties to hide the dark paint there. Ballast would do the same but I might never make it to the ballast stage. Someone posted about painting fine detail with eyeliner brushes so I bought 100 for $7 and do I ever love them. It was easy to paint the bottom area between the ties and I'll be using these for a lot of my fine detail painting now. At 7 cents per brush (and they clean easily or throw them away) they are as good or better than brushes I've paid $7 or more per brush.
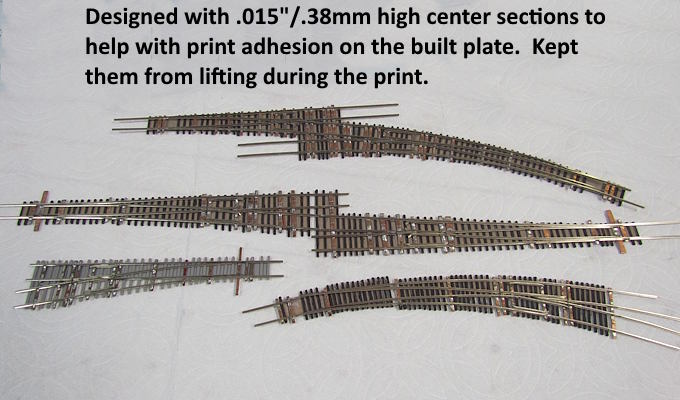
Above is an example of turnout combinations that were printed with the center section.
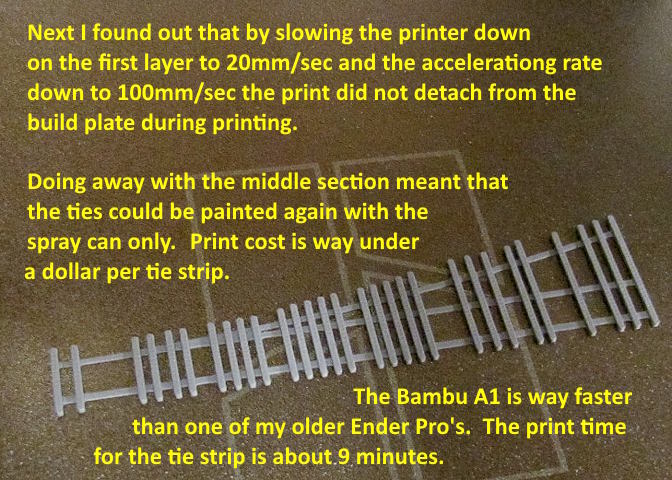
After some thought, should of thought of this sooner, I decided to slow the print speed down and also the acceleration rate down for the first layer. This is easy to do with the Bambu slicer program. This really helped with the adhesion problem and I can now go back to no center section. It only increased print time by a couple minutes and ........
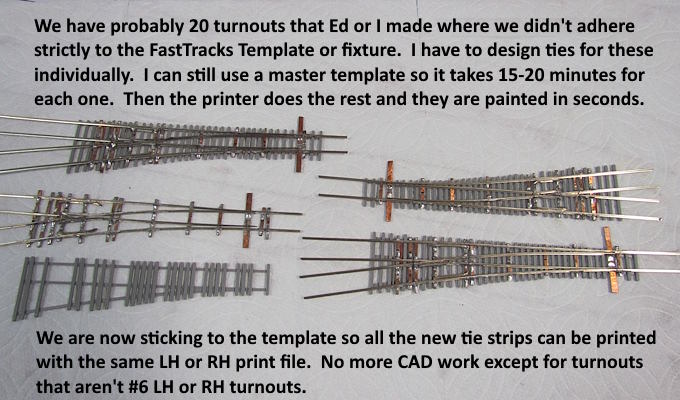
.... now I'll be able to paint the ties in seconds with the spray can. This is going to a be huge savings of time and money for all the remaining turnouts that will be used on the layout. Cost per tie strip is well under a dollar per turnout and using the tie strips is way faster than gluing individual ties to a turnout.
Here is a link to the above on my site if you want to bookmark it (
https://1fatgmc.com/RailRoad/Trackwork/page-60.html ) .
Sumner


